Recently I had a Play Day with a couple of creative friends. We always have such fun together : we can rely on great food, lots of inspiration sharing, and good solid time spent on a creative project. This time it was my choice, and I've long wanted to create a collage box inspired by Anne Brooke's lovely work. We traveled to my friend's house and then started the day with fortifying coffee and cake
I had picked the theme of Klimt in the Garden because I adore Klimt and already had an image of Mother and Child AND a gorgeous serviette of The Kiss. I wasn't sure if the Mother and child image was some kind of transfer and hoped it was a TAP (transfer artist paper) so tried ironing it down....didn't work so either too old or a different print! But decided I could just fuse it to my background with vliesofix and did that with the top layer of my serviette as well.
Then it was time to stitch our base wallpaper squares together for the box shape. Mine are 6" in size
Then I began to narrow down my gatherings
It's really fun to add things like polymer clay and paper castings made on play days in the past
and I'm so lucky to have such a delicious collection of paper serviettes, sari ribbon and scrim to add to the more usual collection of fabric and paper
Because I had my focal images early on, it was quite quick to make decisions about what should be added
LOVE this with stitch added. You can click on any photo to see it larger.
There were a lot more options to be trialed after this
and I was carefully supervised ;-)
I was very happy with where I got to by the end of the day
We all have our own style and it's really fun to see our different interpretations of the same project here together. Click on any photo to see it larger.
Once home it was time to continue working alone. I began with The Kiss
I added metallic thread swirls, some small beads, and a Polymer clay heart and it was quickly complete. I also added the star fabric for a bit of extra interest, but mainly to overlap down into the base of the box so it's not just plain underneath.
I had already chosen a Polymer clay word for The Mother and Child, and had a piece of paper casting that finished this side off perfectly.
I hadn't gone very far with the tree when I finished the play day
I knew this would be the side to have some kind of button closure for the top and I'd initially played a bit with this button idea
but it was quite large and once home I added a special piece of fabric for sky and found a smaller button. Then I decided that repeating elements would add unity to the box, so I added Klimt-like swirls in metallic thread to the tree and I found a use for one of my butterfly buttons, as well as adding some more of that lovely gold sari ribbon.
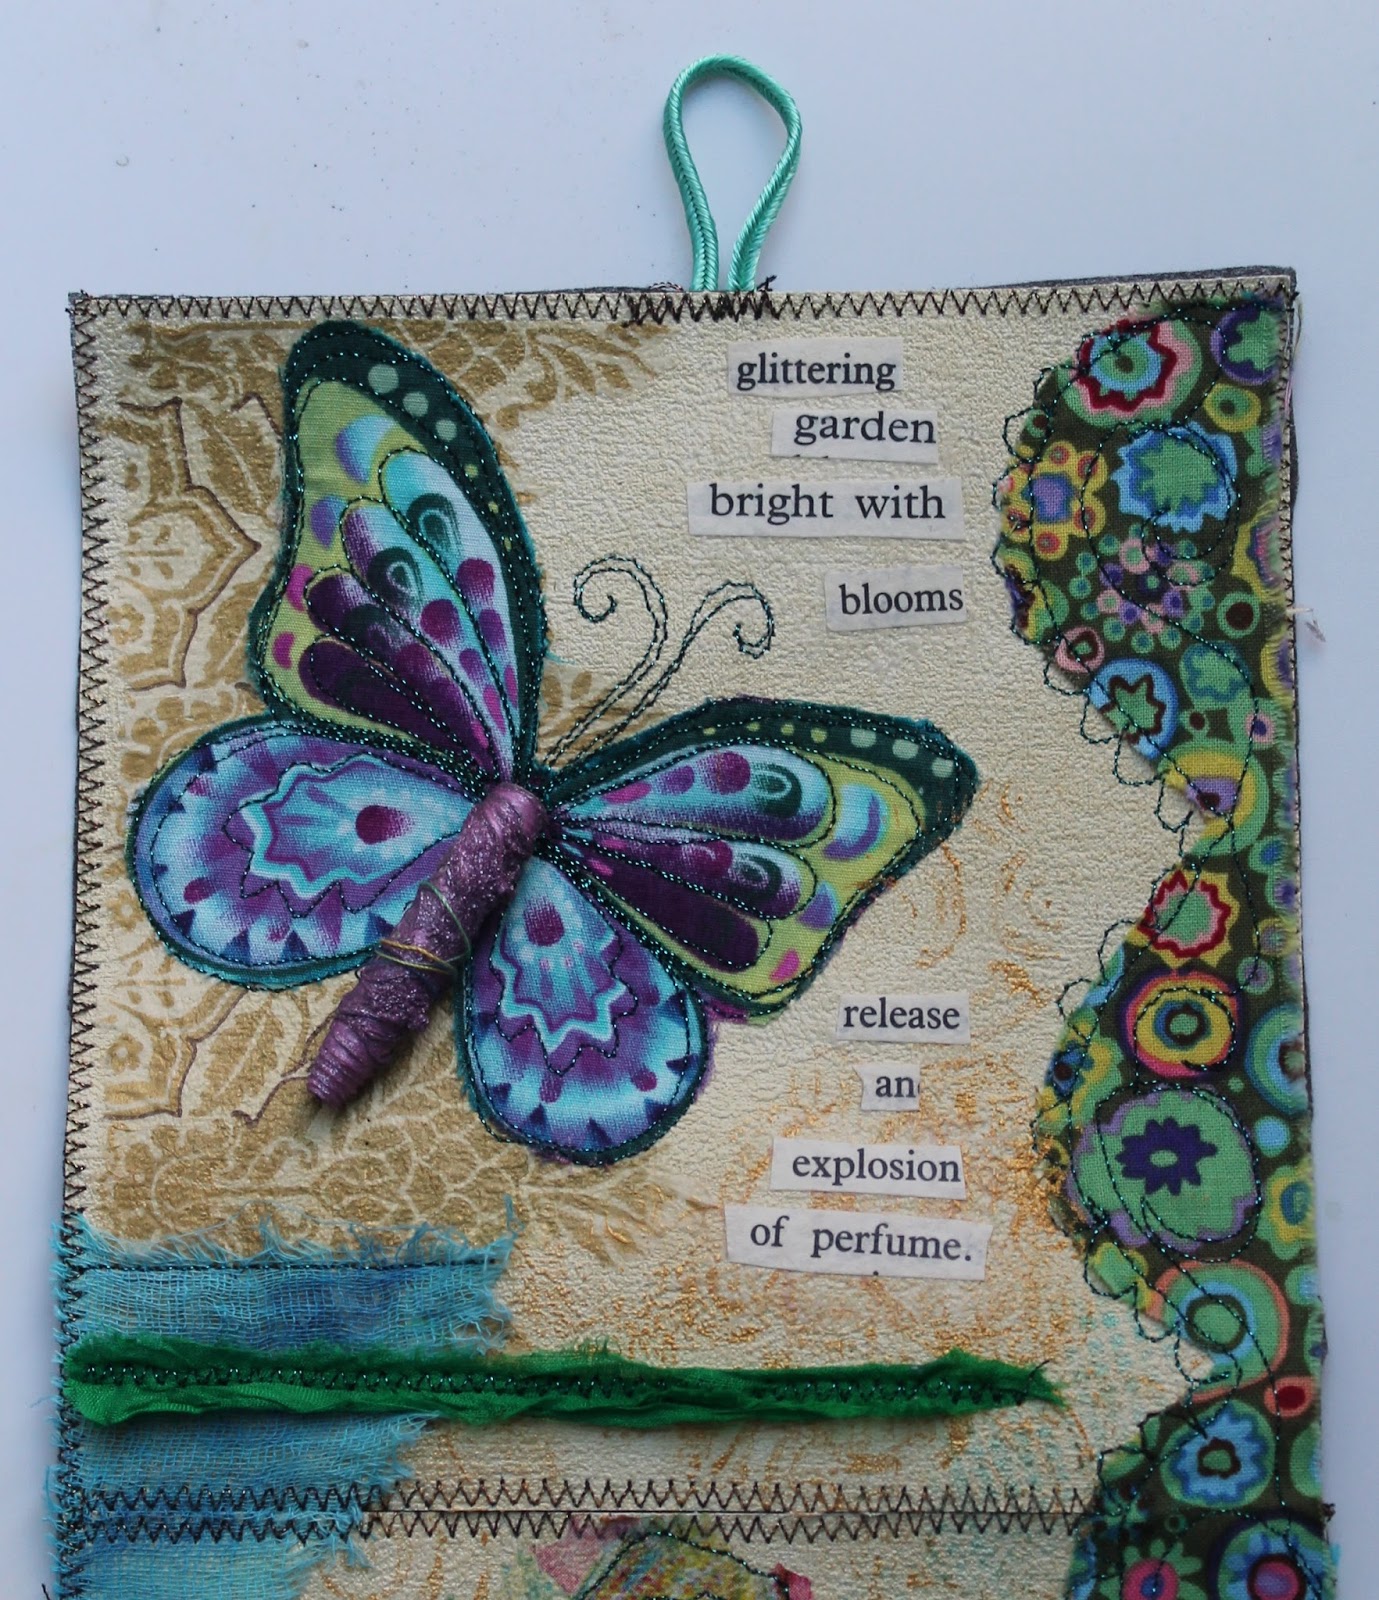
Then it was time to turn my attention to the butterflies side and top.
This green butterfly is a lovely paper serviette - top layer glued down and then stitched around. The design below it is another piece of serviette but the floral is a piece of fabric. The blue buttterfly below is cut from fabric and has a different piece of serviette behind it. This is truly a mixed media piece. I really enjoyed stitching with metallic thread.
I was a bit uninspired what to do next until I had a brainwave in the shower one morning about adding some of my lovely crusty tyvek beads and stamping with gold paint. Once I found the beads and saw their colours, I knew immediately how they would be used and I love how the beads add dimension to the butterflies' bodies
I'd known early on that I was going to use the polymer clay word with the green butterfly, but wasn't sure what else...decided to go back go some of my original play with elements (a great reason to take photos of your process - see photo nearer the top of the post) and remembered I wanted to use scrim and sari ribbon which eventually overlapped above but led me to rediscover and use that textured mesh as the perfect element here
My blue butterfly is on the top of my box so needed a closure and nothing too heavy. I thought about my favourite art journal elements and realised I needed some lovely found words to fill in the gaps
Although you won't see it unless you specially look, I decided to add a bit of extra stitching for interest on the base
Then I added fabric lining and another row of outer stitching and I was ready to sew the sides of my box together.
I love how this project turned out ♥
Which side do you like best?


Wow your box is beautiful and I am so pleased you sent me the link. I love making the boxes too but it is always lovely to see what others do especially on the other side of the world. I love your commentary about your thoughts as I know my mind is full of ideas when I make mine.
ReplyDeleteAnne Brooke xx��
Wow, this is just amazing! If this is not mixed media, I don't know what is! Love the bead for the butterfly's body and all the variety of pieces you incorporated. It must be so tactile too. Cute photo of the kitty watching you from outside! hope you're having a fun time xx
ReplyDeleteIt's lovely. Where do you buy your Tyvek from?
ReplyDeleteThanks all of you - I loved this project from start to finish.
ReplyDeleteSue -I know Dianne at Village Books and Crafts here in Palmerston North has some for sale....
I was lucky that someone gifted me quite a large piece.
Oh my, this is just beautiful! Your sewing space must be a tornado of fun scraps.
ReplyDeleteThanks Nancy - it was so fun to find lots of things from previous play days to include here
ReplyDeleteWhat a beautiful box. Making boxes using fabric was once a passion of mine. Working with fabric and paper is so much fun. Your blog is filled with lovely creations.
ReplyDeleteThanks Monica - one of my fav projects this year ♥
ReplyDelete